通过 Axios 发送 Ajax 请求获取接口数据渲染 Vue 组件
到目前为止,我们编写的 Vue 组件还是纯前端的静态代码,不涉及从后端接口获取数据动态渲染。而在实际项目开发中,通常需要前后端结合来实现组件的渲染:前端负责页面展示和交互,后端负责提供数据存储和获取接口。
今天这篇教程学院君就来给大家演示如何在 Vue 组件中发送 Ajax 请求到后端接口获取数据,并将其渲染到组件们模板中。我们将以之前创建的模态框组件为例,后端数据接口由 Laravel 提供,而负责发送 Ajax 请求的工作由 axios 库承担。
安装 axios 库
Laravel 项目已经开箱提供了对 axios 库的支持,你可以在 package.json 中看到对它的依赖:
"devDependencies": {
    "axios": "^0.19",
    ...
}
而这个库的引入是在 resources/js/bootstrap.js 中完成的,并且这个库可以基于 XSRF Cookie 值自动在请求头中发送 CSRF 令牌:
/**
 * We'll load the axios HTTP library which allows us to easily issue requests
 * to our Laravel back-end. This library automatically handles sending the
 * CSRF token as a header based on the value of the "XSRF" token cookie.
 */

window.axios = require('axios');

window.axios.defaults.headers.common['X-Requested-With'] = 'XMLHttpRequest';
准备后端接口
既然 Laravel 已经帮我们做好了这些准备工作,剩下要做的就是在 Vue 组件中发送 Ajax 请求了。在此之前,我们先在 Laravel 后端创建对应的数据接口。
打开 routes/api.php 文件,新注册一个返回 Web 编程语言列表的 /langugaes 路由:
Route::get('/languages', function () {
    $values = collect(['PHP', 'JavaScript', 'Golang']);
    return $values->map(function ($value, $key) {
        $obj = new stdClass();
        $obj->id = $key + 1;
        $obj->name = $value;
        return $obj;
    });
});
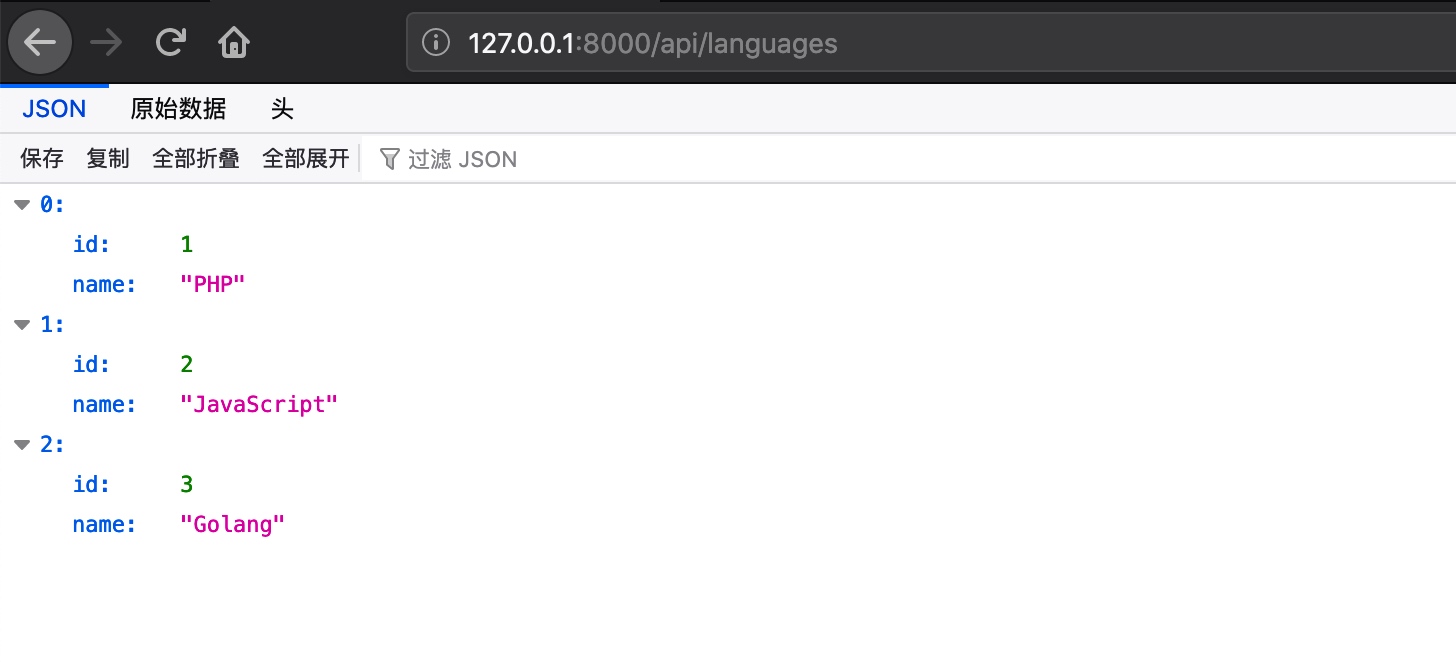
客户端请求该接口获取到的会是一个已经转化为 JSON 格式的响应数据:
编写 ModalComponent 组件
我们在 resources/js/components 目录下新建一个 ModalComponent.vue 文件,再将 Vue CLI 项目中编写的 ModalExample 组件代码拷贝过来,由于现在模态框主体内容部分渲染的 Web 语言列表是从后端接口返回的数据,所以需要对这部分代码做调整:
<template>
    <div class="modal fade" id="exampleModal" tabindex="-1" aria-labelledby="exampleModalLabel" aria-hidden="true">
        <div class="modal-dialog">
            <div class="modal-content">
                <div class="modal-header">
                    <h5 class="modal-title" id="exampleModalLabel">
                        <slot name="header"></slot>
                    </h5>
                    <button type="button" class="close" data-dismiss="modal" aria-label="Close">
                        <span aria-hidden="true">×</span>
                    </button>
                </div>
                <div class="modal-body">
                    <ul>
                        <li v-for="language in languages" v-bind:key="language.id">
                            <slot v-bind:language="language">{{ language.name }}</slot>
                        </li>
                    </ul>
                </div>
                <div class="modal-footer">
                    <button type="button" class="btn btn-secondary" data-dismiss="modal">Close</button>
                    <button type="button" class="btn btn-primary">Save changes</button>
                </div>
            </div>
        </div>
    </div>
</template>

<script>
export default {
    name: 'ModalComponent',
    data() {
        return {
            languages: []
        }
    }
}
</script>

<style scoped>
ul li {
    text-align: left;
}
</style>
可以看到,我们将 langugaes 调整成了模型数据,默认值是一个空数组。然后,我们在 app.js 中注册这个组件:
...

Vue.component('hello-component', require('./components/HelloComponent.vue').default);
Vue.component('modal-component', require('./components/ModalComponent.vue').default);

...
再到 welcome.php 视图中引入 modal-component 这个组件:
<hello-component>你好,学院君!</hello-component>

<!-- Button trigger modal -->
<button type="button" class="btn btn-primary" data-toggle="modal" data-target="#exampleModal">
    模态框
</button>
<!-- Modal -->
@verbatim
<modal-component>
    <template slot="header">Web 编程语言列表</template>
    <template scope="bodyProps">
        {{ bodyProps.language.name }}
        <span v-if="bodyProps.language.name === 'PHP'">☑️</span>
    </template>
</modal-component>
@endverbatim
注意到我们在 modal-component 外层包裹了 @verbatim...@endverbatim,这是为了避免 Vue 组件代码与 Blade 语法冲突。
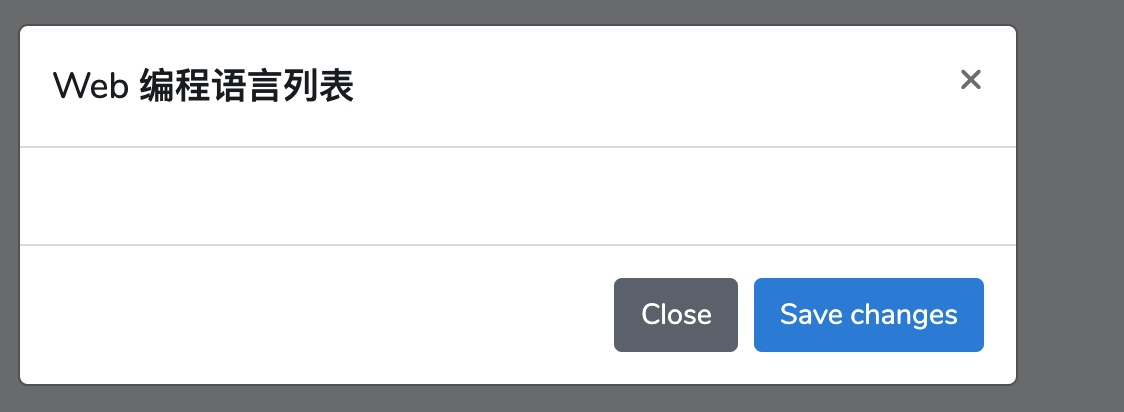
这个时候,如果我们点击模态框(假设前端使用 npm run watch 进行热重载,否则需要运行 npm run dev 重新编译前端资源),会看到 Web 编程语言列表为空:
通过 Axios 发送 Ajax 请求
接下来,我们在 ModalComponent 组件代码中定义一个 mounted 钩子函数,该函数会在 Vue 虚拟 DOM 渲染前运行,所以在这里编写通过 Axios 发送 Ajax 请求获取后端接口数据的逻辑再合适不过了:
<script>
export default {
    name: 'ModalComponent',
    data() {
        return {
            languages: []
        }
    },
    mounted() {
        axios.get('/api/languages').then(response => this.languages = response.data);
    }
}
</script>
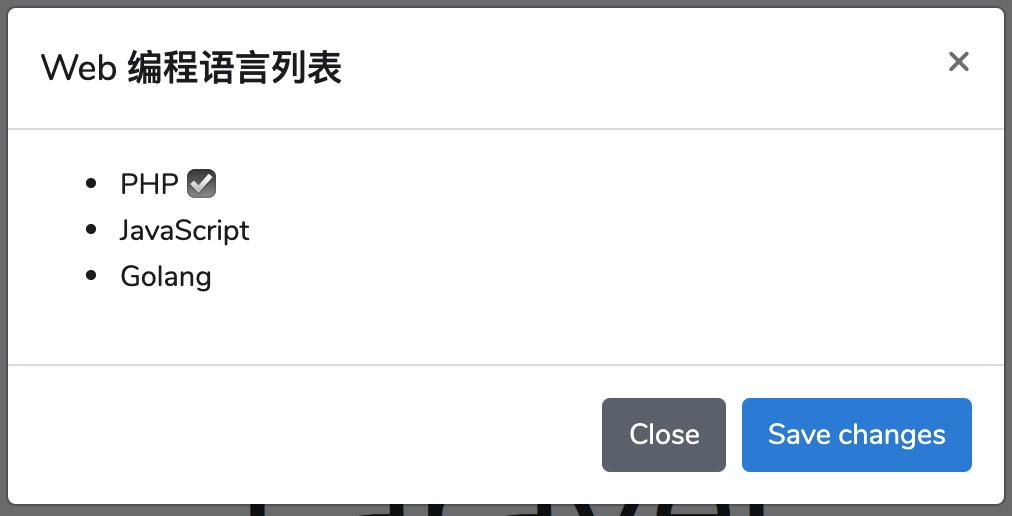
在 mounted 钩子函数中,我们通过 axios 向后端 /api/languages 接口发起 GET 请求,然后把返回的 JSON 格式响应数据赋值给 languages 模型数据,这样一来,当组件渲染时,就可以通过迭代该模型数据显示 Web 编程语言列表了,点击浏览器页面中的模态框按钮,这一次,列表项不再是空的了:
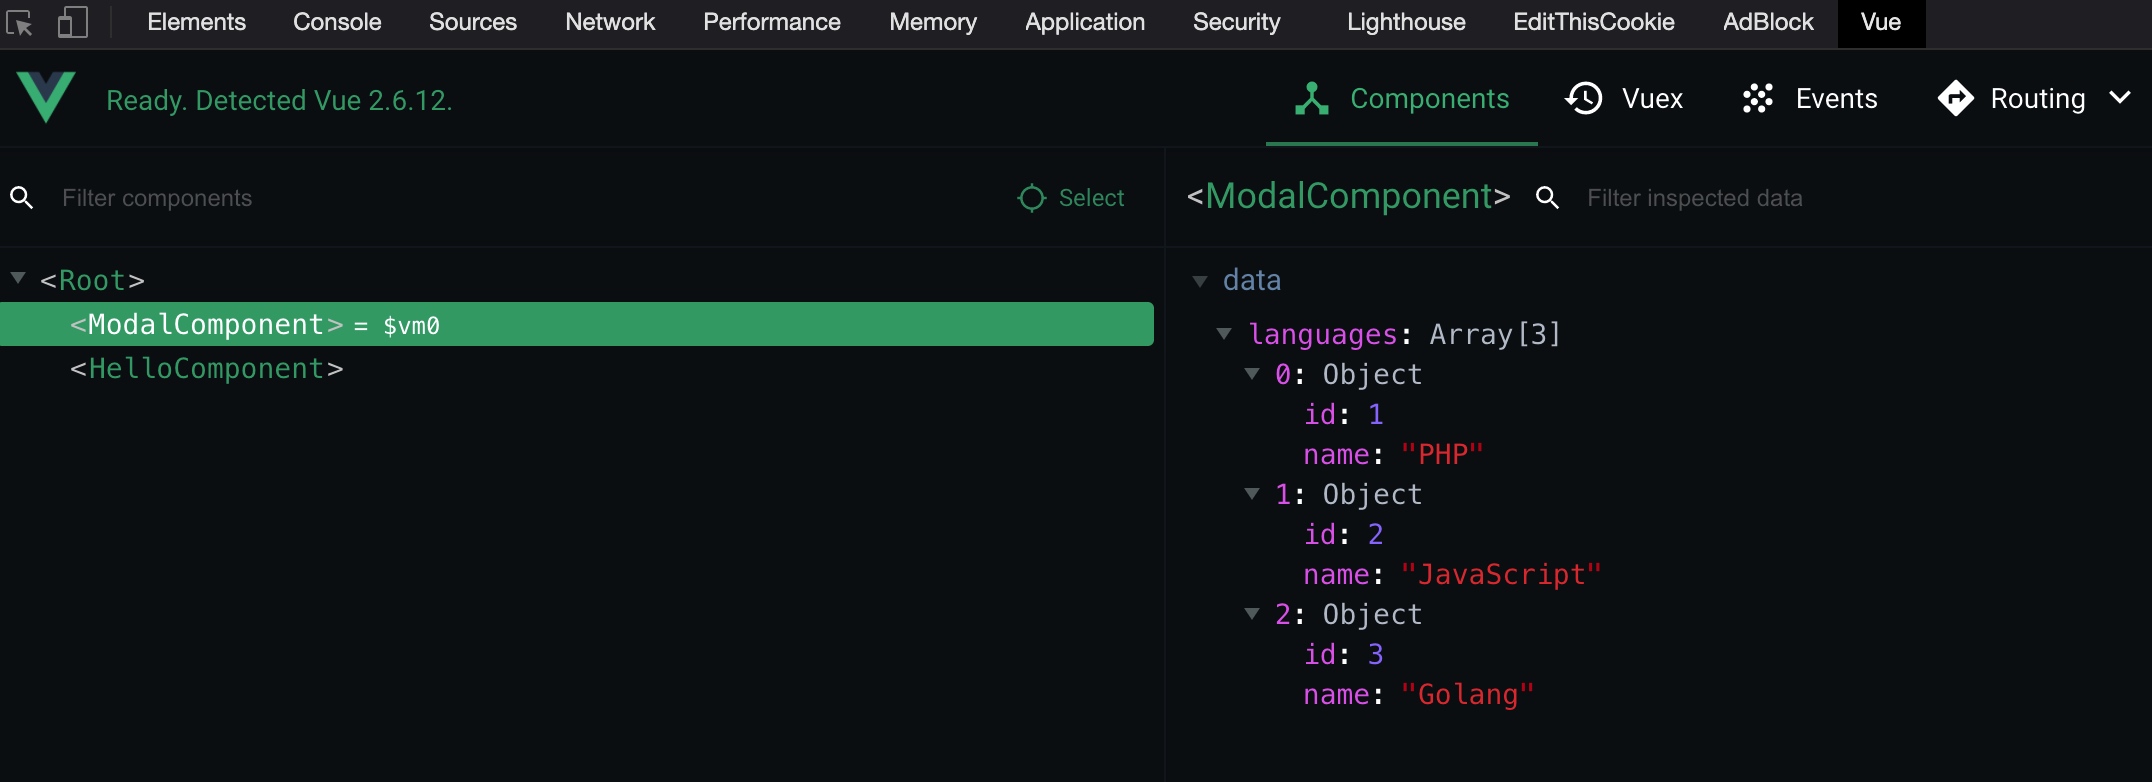
你也可以在 Vue Devtools 中看到对应的组件模型数据:
生命周期钩子函数
这里说到钩子函数,顺便介绍下,Vue 对象实例的整个生命周期过程中,系统内置了多个钩子函数,不同钩子函数在不同时期运行,作为开发者,我们可以借助这些钩子函数进行数据初始化或者清理工作。
下图是 Vue 官网提供的 Vue 实例完整生命周期及不同时期触发的钩子函数(红色方框标注):
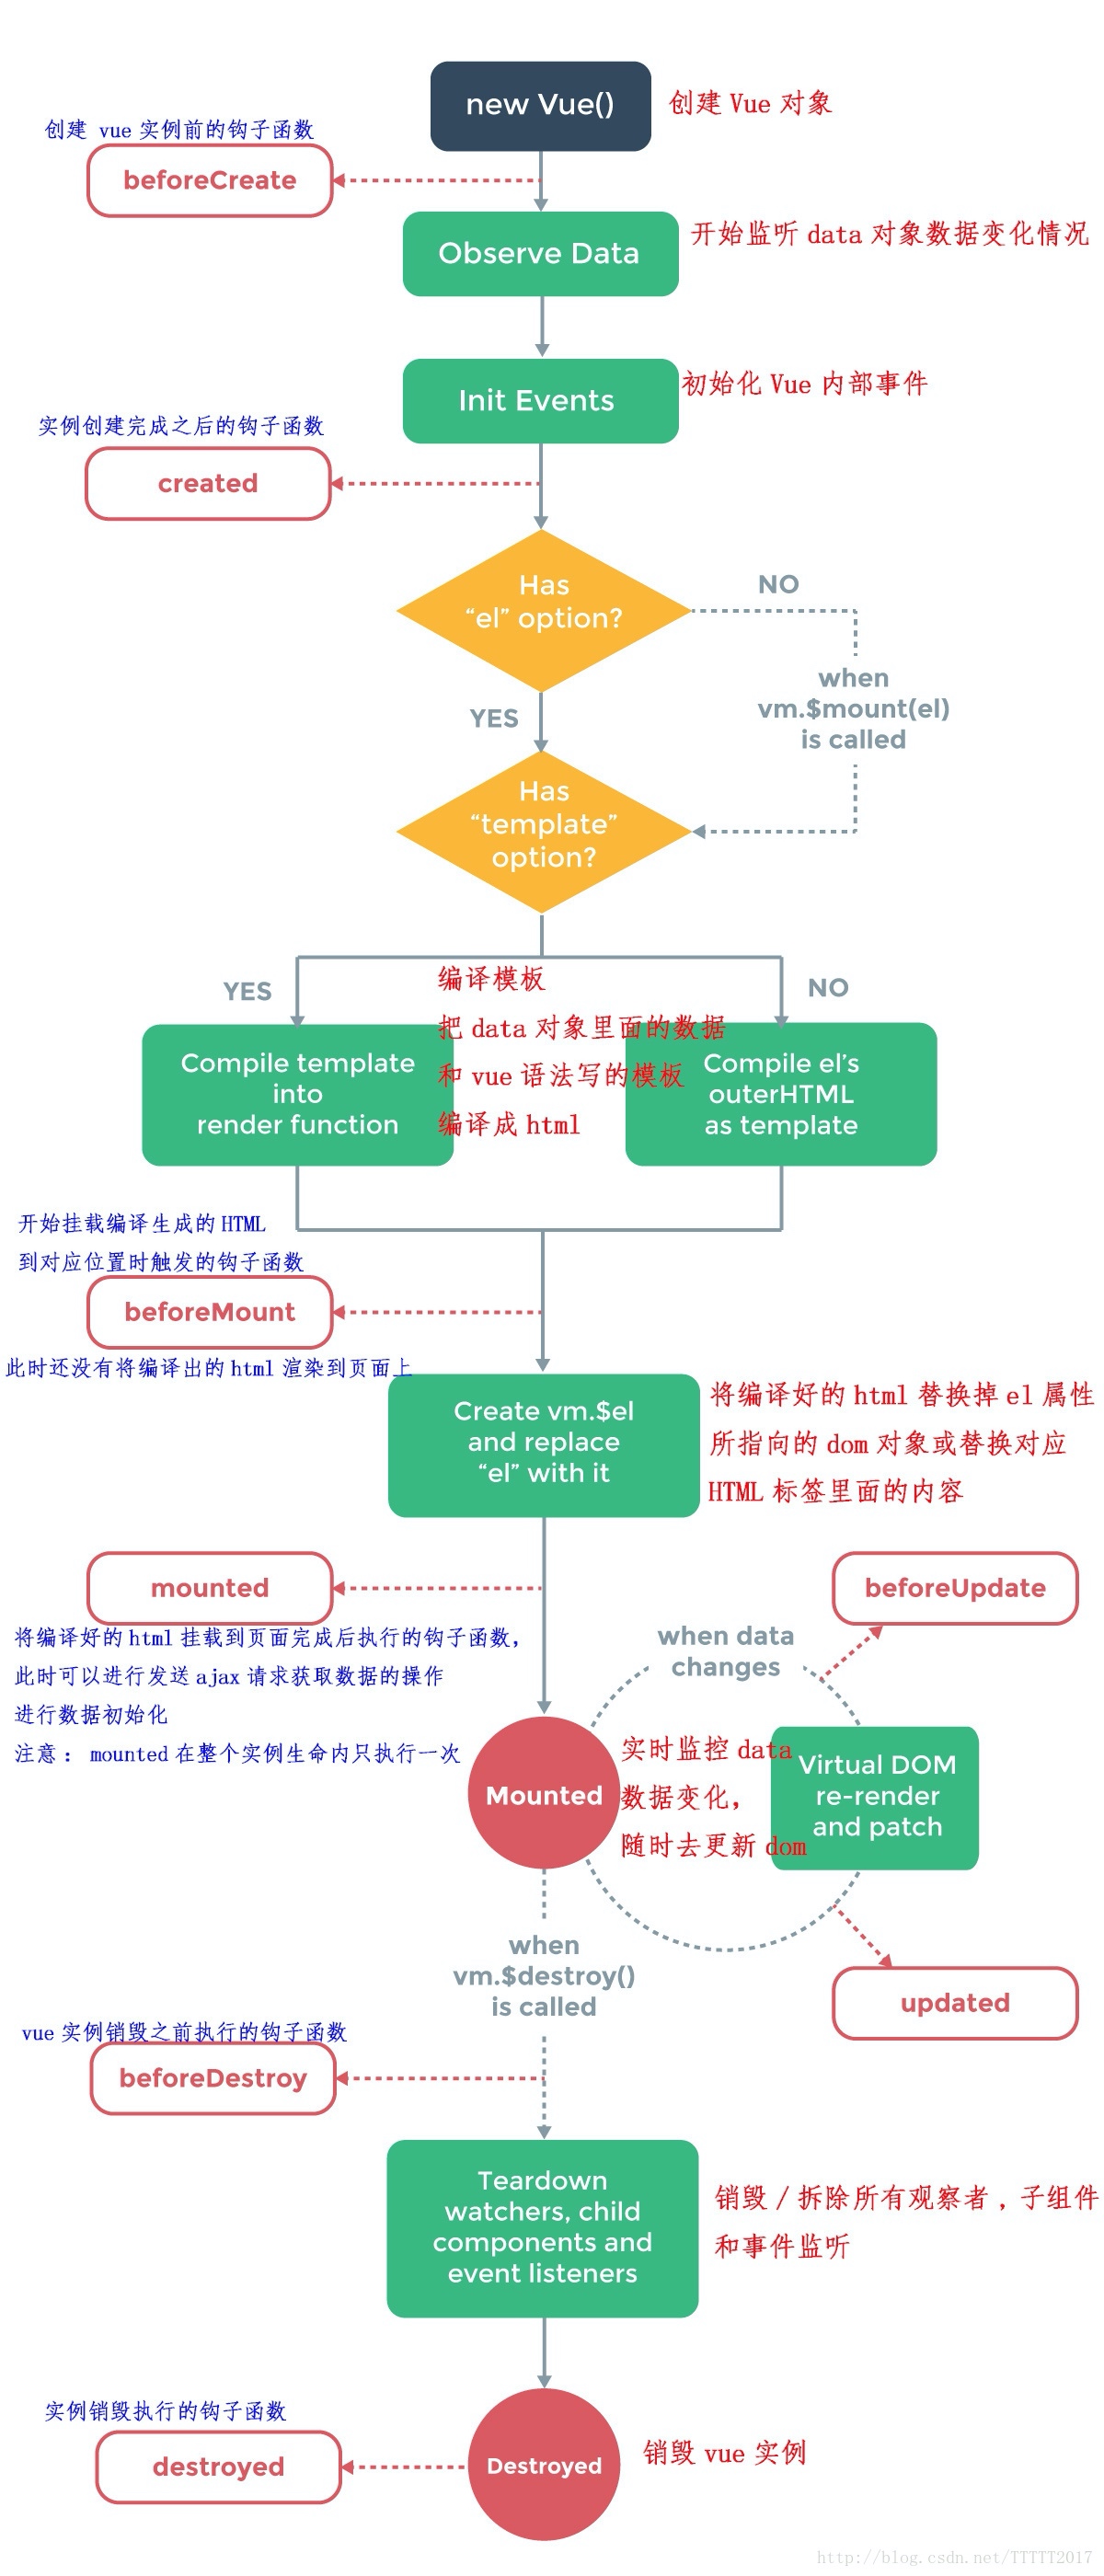
如果需要使用钩子函数,可以参考这张图进行定义,不同钩子函数的用途已经通过蓝色文本详细注释了。
无评论